Integromat

Markdown

View as Markdown

Integromat is an alternative to Zapier to integrate Collect.chat with other apps you use daily. It is a powerful tool for automating manual processes. Connect your apps, services, and devices with each other without having any programming skills.

How it Works?

We use the Webhooks from Integromat to make a bridge for the data to pass to your app. Every time a complete response is submitted, the data will be received by Integromat and send to your app instantly.

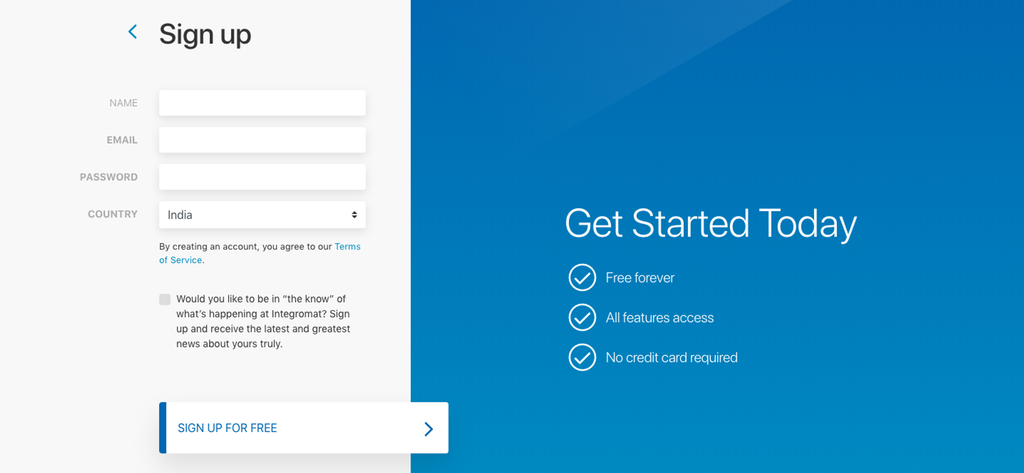
Create an Account in Integromat

Create a Scenario

You have to create a scenario in your Integromat to start with. Click on Scenarios and then press, Create a new scenario.

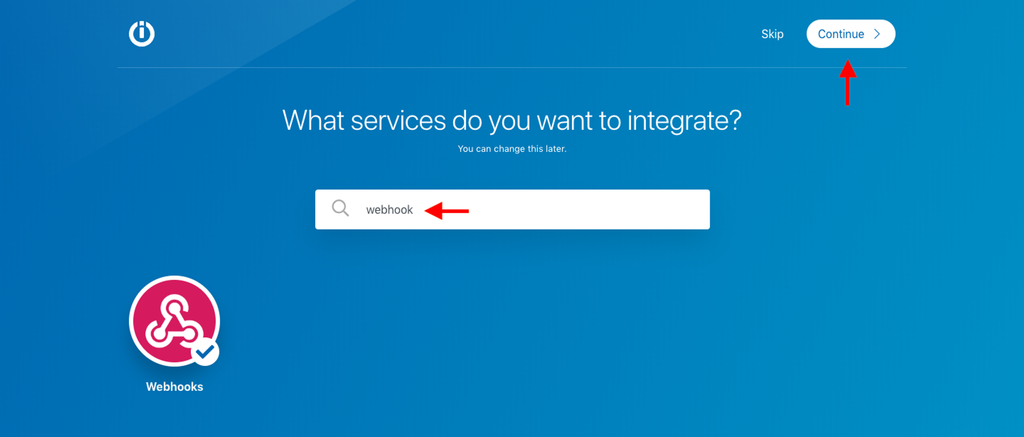
Now search for "Webhook", select it and click on Continue.

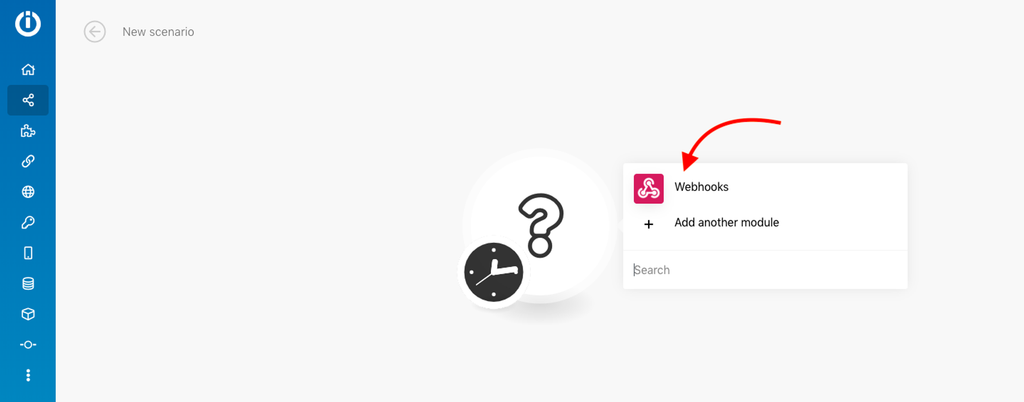
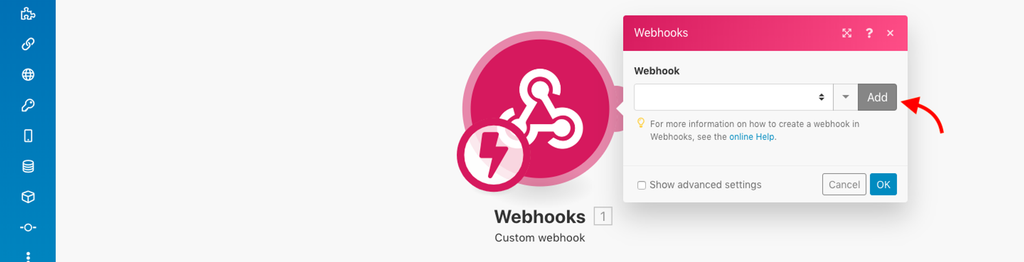
Click on the main circle on the screen to get the menu for your modules. Then select Webhooks.

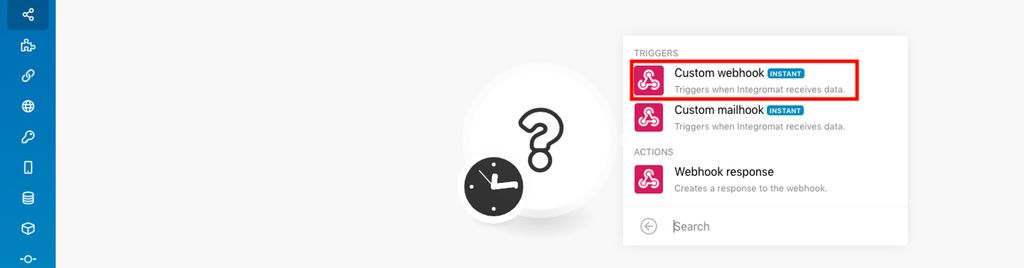
Select Custom webhook.

You have to create a new webhook. So click on Add.

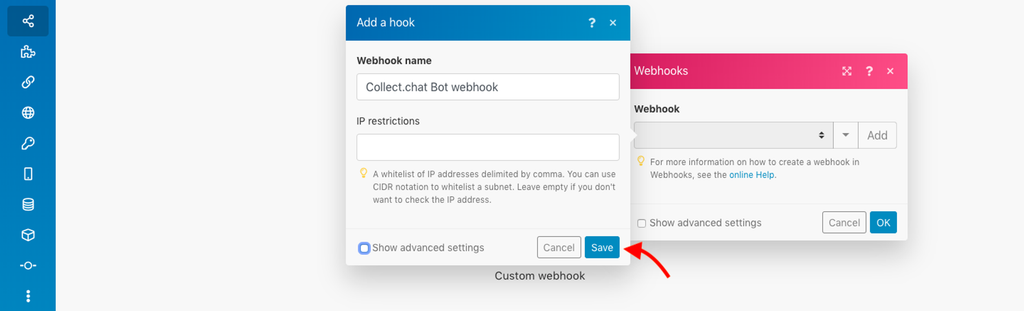
Give the webhook a name and click on Save.

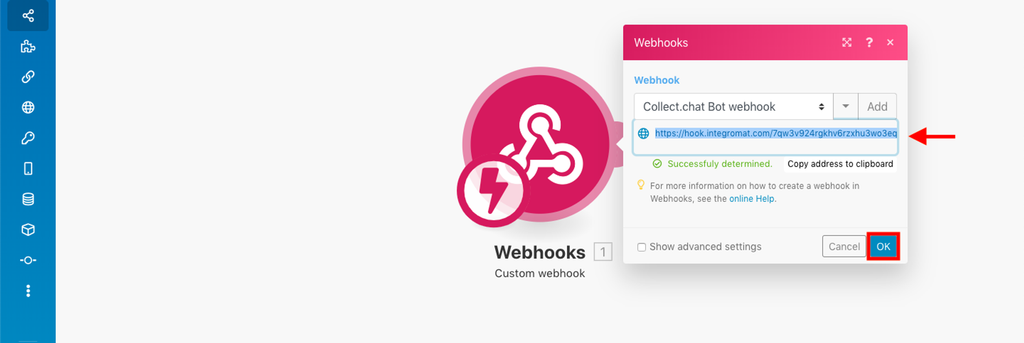
It will generate a new webhook URL. Copy this URL and click on Ok.

Add Webhook URL to Settings

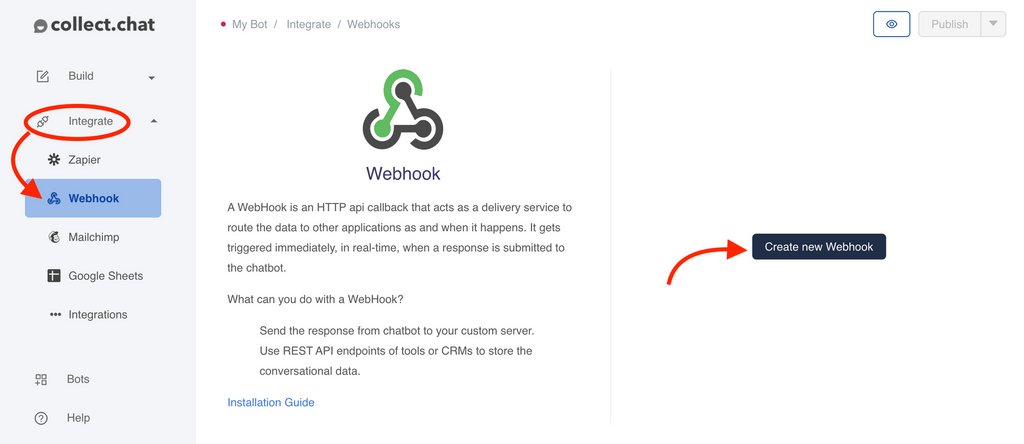
Go to your Collect.chat account and under Integrate > Webhook, click on Create new Webhook.

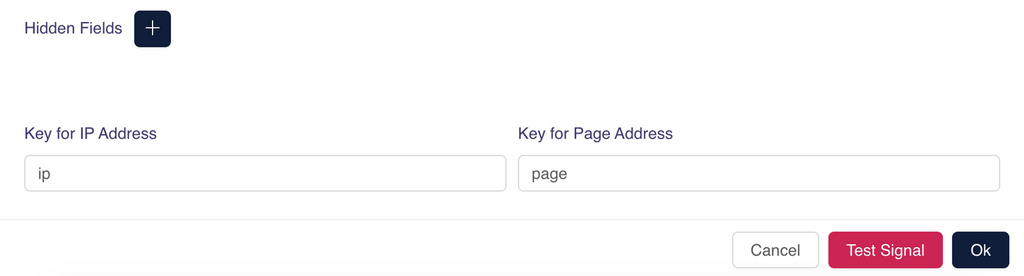
Paste the newly created webhook URL. Provide a unique key for your questions. Make sure that the Content Type is "application/x-www-form-urlencoded".

Add your App

Now that the Webhook information has been added to your chatbot. You can choose your App, where you need to send the data to. In this example, we will show how to create a new lead in FreshSales, when you have an inquiry coming in.

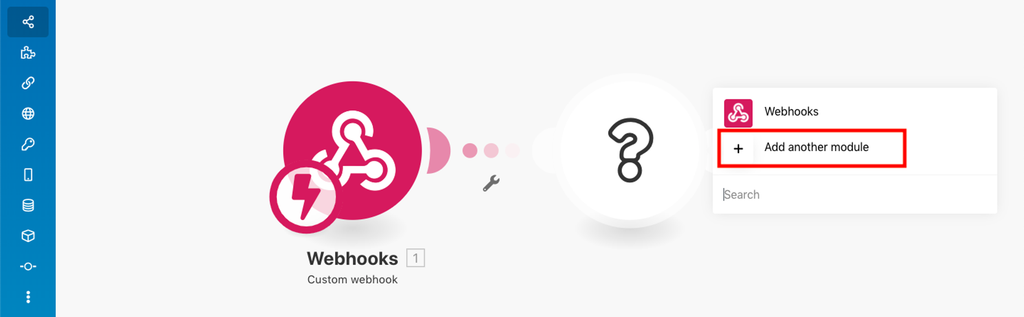
Go back to your Integromat Scenario and add the next bubble. Then click on Add another module.

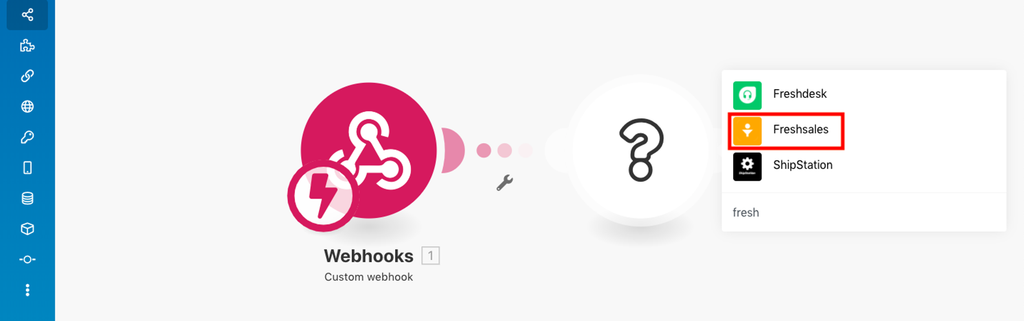
Search for FreshSales and then select it.

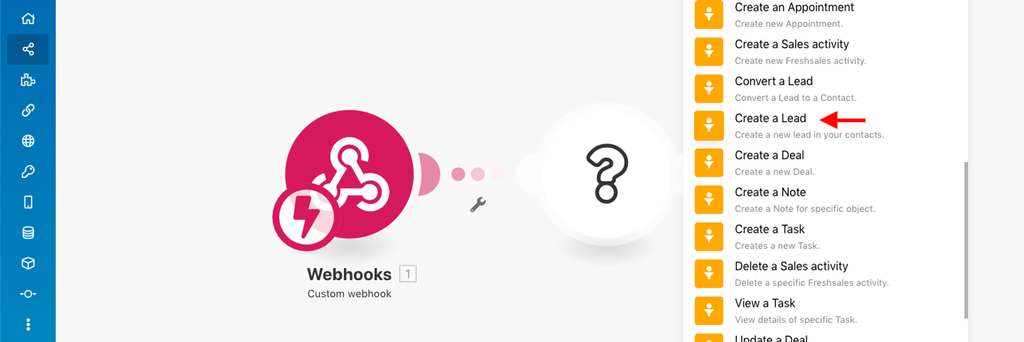
Click on Create a Lead.

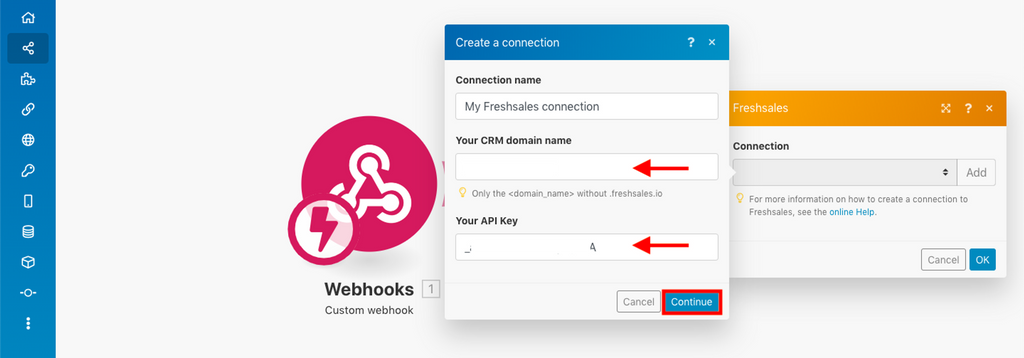
You have to create a connection to your app. This will vary from app to app. Each one has a different way of connecting with Integromat. Click on Add to proceed.

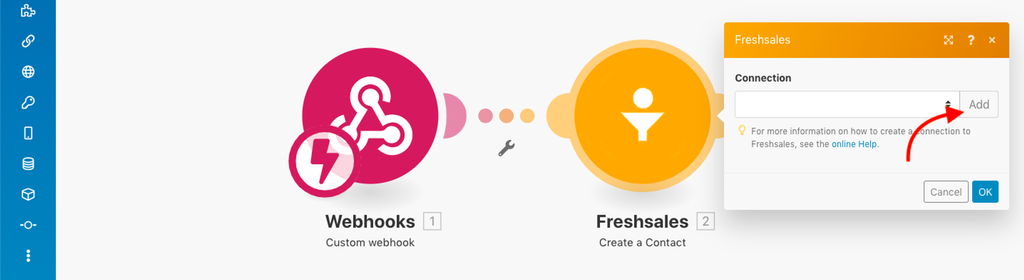
For FreshSales, you need to provide your CRM domain name and API key.

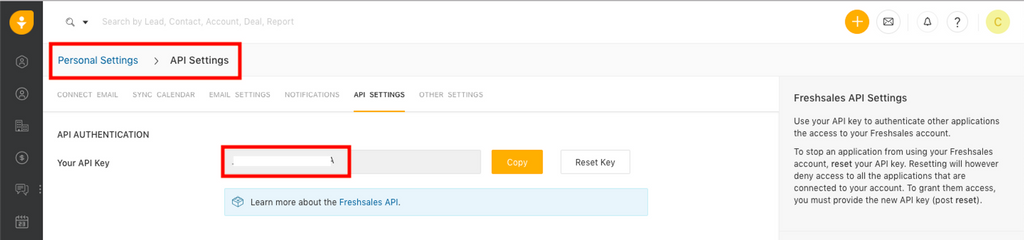
You can get your FreshSales API key from Personal Settings.

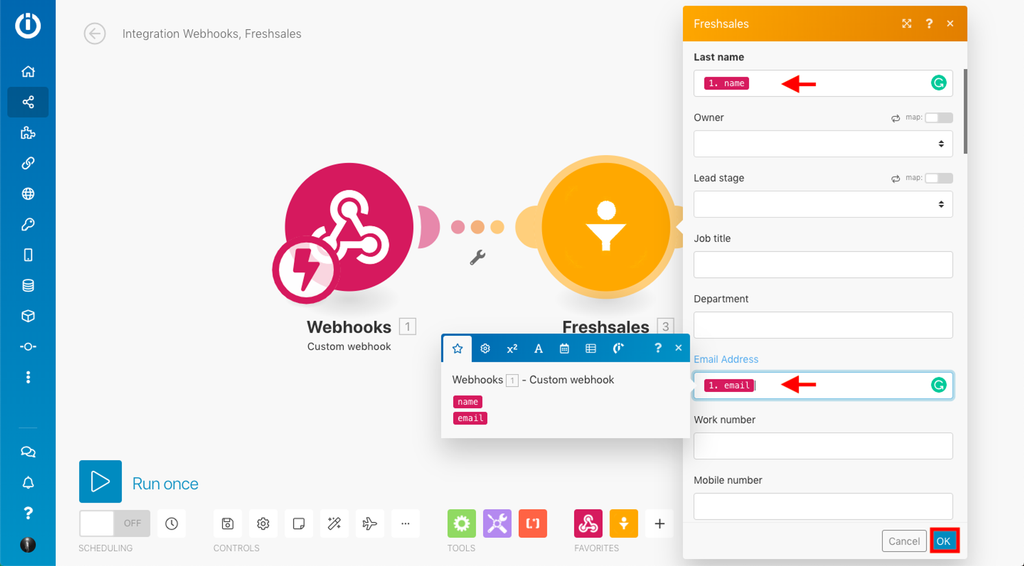
Now that the connection to FreshSales has been made, you can proceed to mapping the fields from your chatbot to the ones in FreshSales. Here we will map the "name" key to "Last name" and "email" key to "Email Address" in FreshSales. Once the keys are matched, click on Ok.

Save your scenario by clicking on the save icon.

Test your Scenario

Once your scenario is created, you can turn it on and see if the integration is working.

Test the Integration

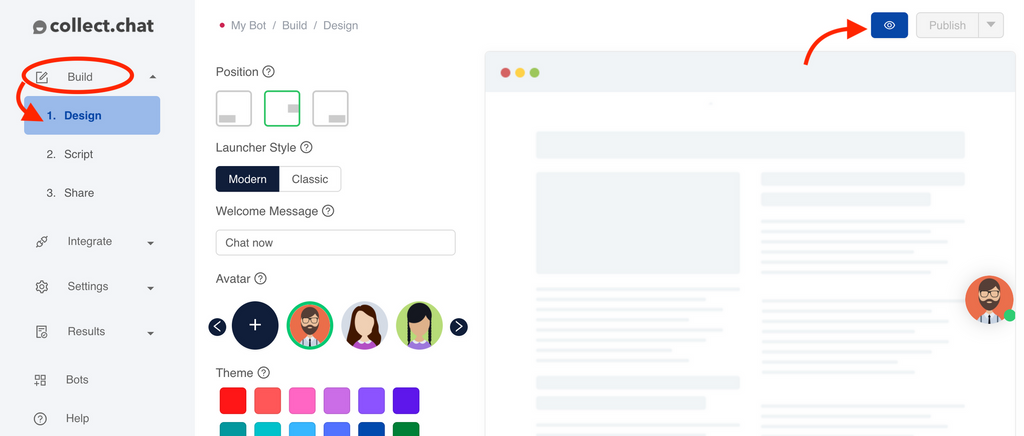
  • Go to your Dashboard > Build > Design.

  • Click on the Eye-shaped icon to have a test conversation with your chatbot.

  • Have a complete interaction with your chatbot.

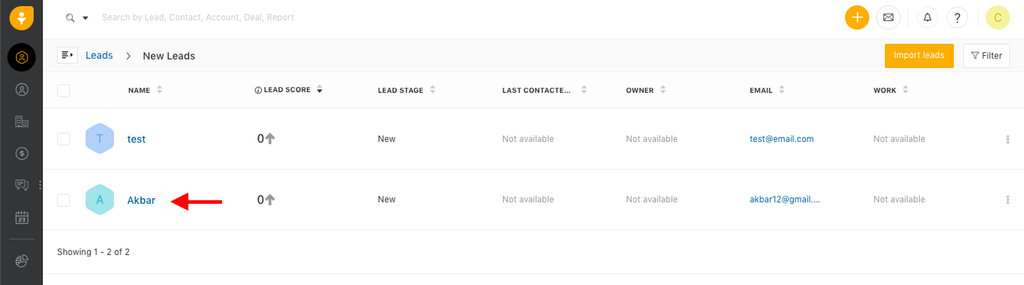
Go to FreshSales, under Leads > New Leads, see if it is getting populated. If yes, the integration was a success!


Still need help?

Contact us

Was this article helpful ?

Still need help?

Contact us

General

General

How to create your first chatbot with Collect.chatGoogle Tag ManagerMailChimpShow or Hide the bot based on URLSet up custom domain for chatbot pageEmail NotificationsResponse StatusWhere can I get my Invoice?Facebook PixelSend the data to your server using webhookGoogle CalendarIs there a discount?How to add chatbot to BigCommerceTranslate your ChatbotLogical JumpGoogle SheetsSalesforceMultiple Emails and RoutingFreshdeskIntegromatMy payment has failed, what to do?What is a response?I am getting spam responsesZapierWhat happens when I upgrade or downgrade?LeadsBridgeGoogle AnalyticsWhy am I not getting email notifications?How to add billing address to my invoice?Webhook in my chatbot is not workingThe changes I made to my chatbot are not visibleWhat is your refund policy?Why is my chatbot not showing up on my website?Do you have a trial account?How to add chatbot to WordPressHow to cancel my account?How to add chatbot to Medium BlogsHow to add chatbot to ShopifyHow do you charge us?How to add chatbot to CloudflarePermanently remove my chatbotHow to make the payment?How to add chatbot to NotionCan I use Collect Chat for free?What happens when I cross the response limit?How to add chatbot to Mobile AppHow to add chatbot to WeeblyHow to add chatbot to TumblrHow to add chatbot to SquarespaceHow to add chatbot to WixShare chatbot as a Landing PageHow to add chatbot widget to WebsiteConversational Marketing Chatbots and Collect.chatHow Chatbots work inside a WebsiteHow to embed chatbot in a webpageDesign a conversational landing pageCreate a copy of the botAdd a custom avatarCan I block responses from an IP address?How to add a welcome message to chatbot widget?Add a video from LinkedIn to the chatbotStop saving data on Collect.chat's serverAdd slides from SlideShare inside the chatbotAdd a video to the chatbotCan I customize the speed of the conversation?Validate phone number inside chatbotHow to capture email addresses?Open the chatbot if user is about to leaveShow or Hide the bot based on ReferrerAddress users by name using variablesEdit the chatbot conversationShow or Hide the bot based on LanguageHow to design my chatbot?Add an image to the chatbotShow or Hide the bot based on API parametersShow or Hide the chatbot based on deviceShow or Hide the bot based on CountryShow or Hide the bot based on UTM tagsShow or Hide the bot based on Operating SystemManage the date and time of when bot has to appearHow to target my users?Show or Hide the bot based on browserOpen the chatbot as the user is scrolling downTeam CollaborationShow or Hide the bot for repeating visitorsHow to hide the chatbot for a user who has already given answersOpen the chatbot widget based on a timerRedirect to a URL based on user choiceWhat is a Script Type?Add data from URL parameters inside a conversationWhatsApp typeOpinion Scale TypeAppointment typeFile Upload TypeThank You TypeText Question TypePhone Number TypeSet up custom domain for chatbot pageRange TypeLinks TypeNumber TypeDate TypeMessage TypeRating TypeEmail TypeAdd live chat supportMulti Select TypeList TypeCapture UTM parameters from URLsSend data from chatbot to pre-fill a webpageTrigger chatbot from a Link or ButtonMulti Choice TypeHide welcome message in mobileHide welcome message for repeating visitorsHow can I analyze my data?Load a new chatbot for repeating visitorsHow to edit my personal information?Add custom messages to the conversationTrack your chatbot using custom analyticsAdd custom data in chatbot responseIdentify a user in Email or SMS campaignsDynamic web pages based on user choiceHow to enable developer options when the chatbot type is Embed?Invoke a new chatbot on the same webpageOpen the chatbot instantly on page loadDo you have an API or tools for developers?Can I export my data?Why do I see symbols in my exported CSV?Do you have support for RTL languages?How to accept only business emails?How to get IP address of chatbot userWhat does your Unlimited Plan offer?How to accept payment via the chatbot?In WordPress, how can I embed a chatbot inside a page or a post?In WordPress, how can I add a different chatbot for a different page?How to trigger a bot from a WordPress Menu?In WordPress, how can I control the behaviour of the bot?How to change my email address?Publish the chatbotHow to be an affiliate?How to change metadata for chatbot pageCan we make a messenger chatbot?Are you GDPR compliant?Can I use multiple chatbots on my websites?Where can I see my Bot ID?How to change my password?Hide welcome message everywhereSetup different chatbot on different pages of the websiteTemporarily disable my chatbotRedirect to a page when conversation endsMulti Select and Multi Choice, what's the difference?Copy a MessageHow to add chatbot to WordPressIn WordPress, how can I embed a chatbot inside a page or a post?WhatsApp typeHow to trigger a bot from a WordPress Menu?In WordPress, how can I control the behaviour of the bot?Send the data to your server using webhookIn WordPress, how can I add a different chatbot for a different page?Welcome to the AI-first Help.Center!Welcome to the AI-first Help.Center!