Zapier

Markdown

View as Markdown

Zapier gives you the power to integrate Collect.chat with hundreds of other apps you use like Salesforce, Slack, and much more. Now you can easily automate the tedious tasks in your workflow. Collect.chat will fit right into the way you work.

Choose Zapier

Once your chatbot is designed and ready, you can proceed to the Integrate > Integrations tab.

Create the Zap

You can create a Zap by using any of the templates provided in Collect.chat dashboard or start fresh from the Zapier dashboard.

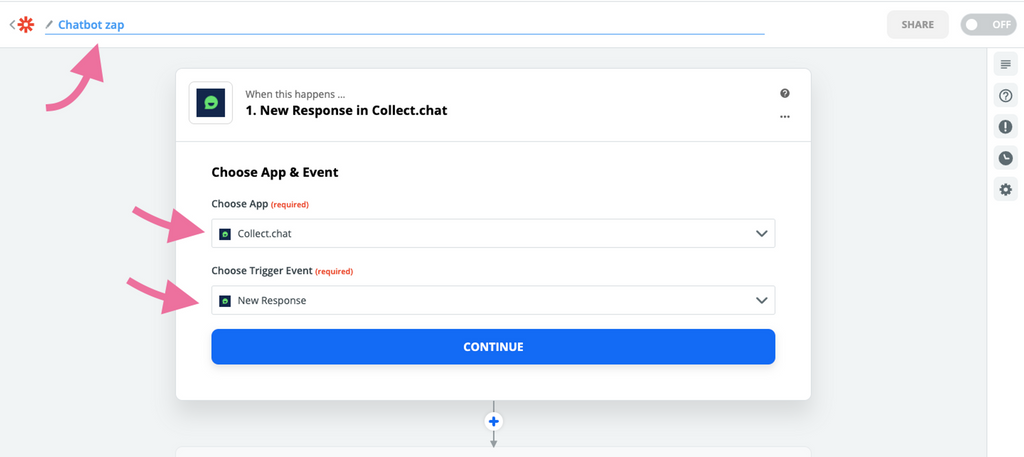
  • Start by clicking on "Make a Zap".

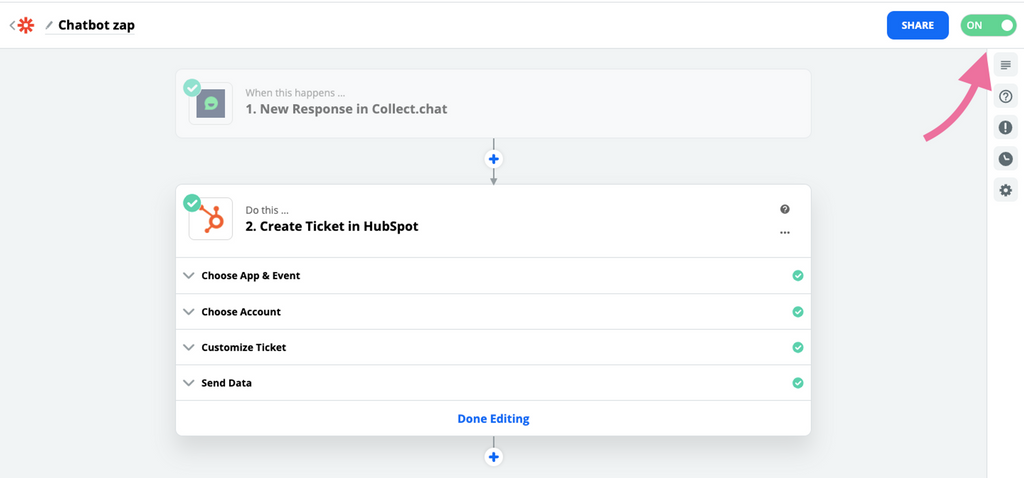
  • Give you zap a good name. Here we have named it "Chatbot zap".

  • Choose "Collect.chat" from the app list and set trigger event as "New Response".

Connect your Collect.chat Account

Click on Sign in button to connect Zapier with your Collect.chat account

  • Grant Zapier access to your Collect.chat account

  • Click on Continue in Zapier

  • Select your bot from the dropdown list. Listing all the bots may take sometime.

  • Once the bot is selected, you can click on "Test & Continue"

Choose the app you want to integrate with

Once the chatbot details have been mentioned, you need to tell Zapier how and where this data must send. In this example, we will use HubSpot.

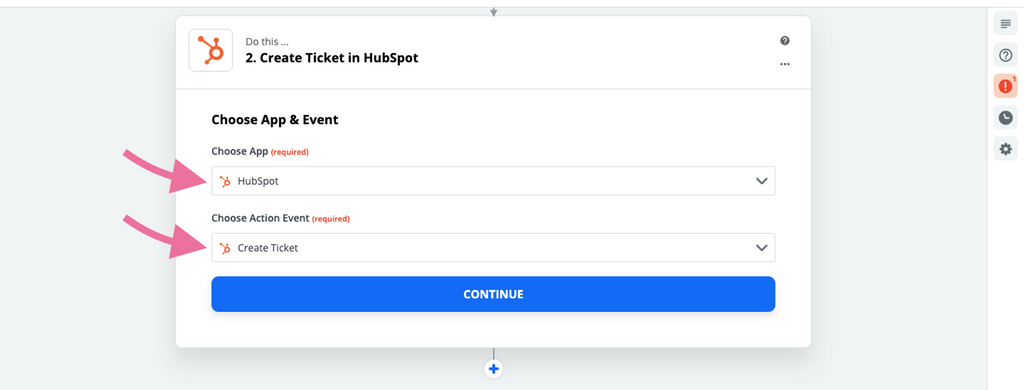
  • Choose the app as "Hubspot"

  • For this example, we will choose "Create ticket" as the action to perform when a chatbot response is submitted

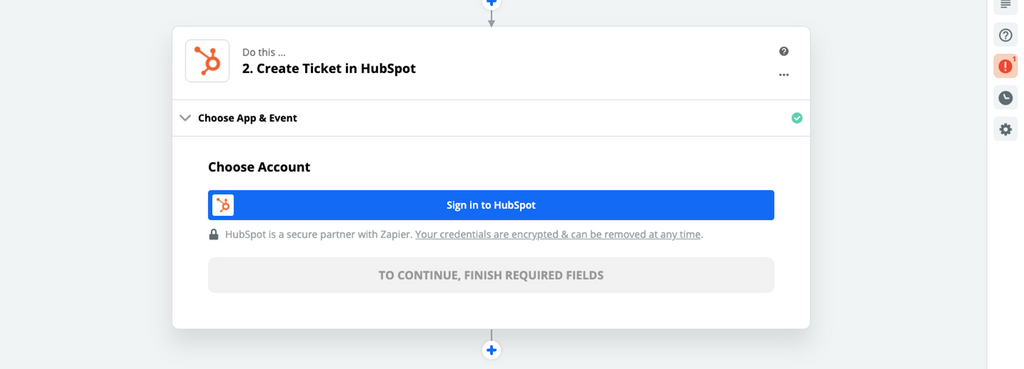
Grant Zapier access to the app

Once you grant Zapier access to Hubspot, You have to match the fields of ticket creation in Hubspot to your chatbot questions.

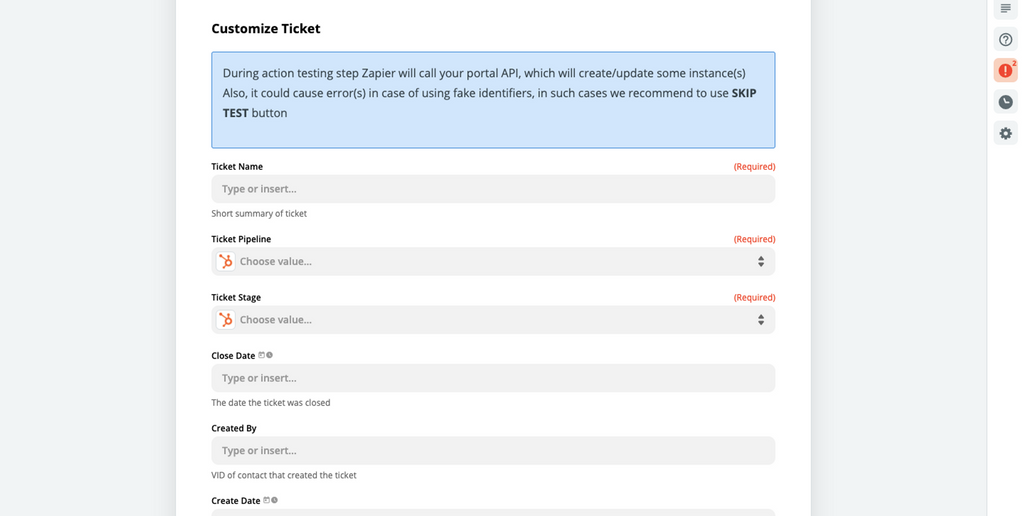
Do not forget to fill in the required fields with the appropriate answers from the chatbot. Just click on a field and select the chatbot question that needs to be added to the Hubspot ticket.

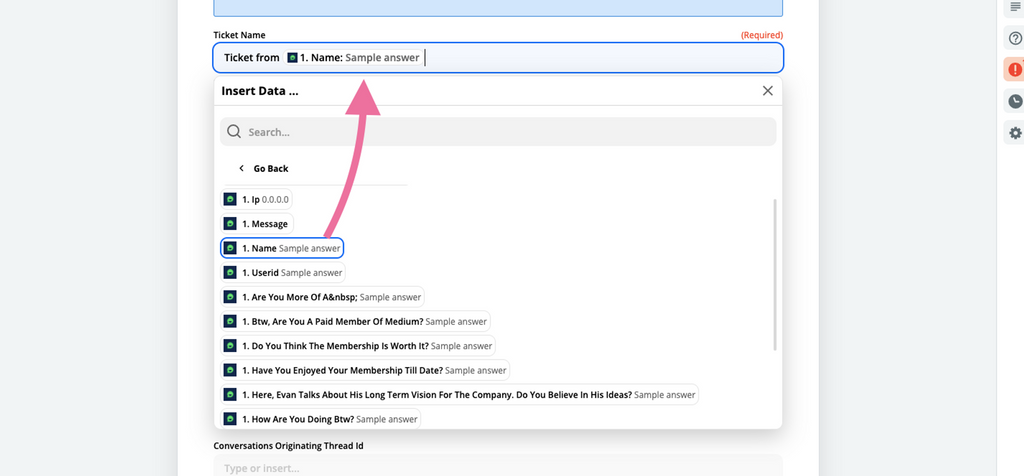
Click on "Continue", once all the fields are matched. Make sure to turn on the Zap.

Test your Integration

Once the Zap has been edited you can verify whether the integration is working properly or not.

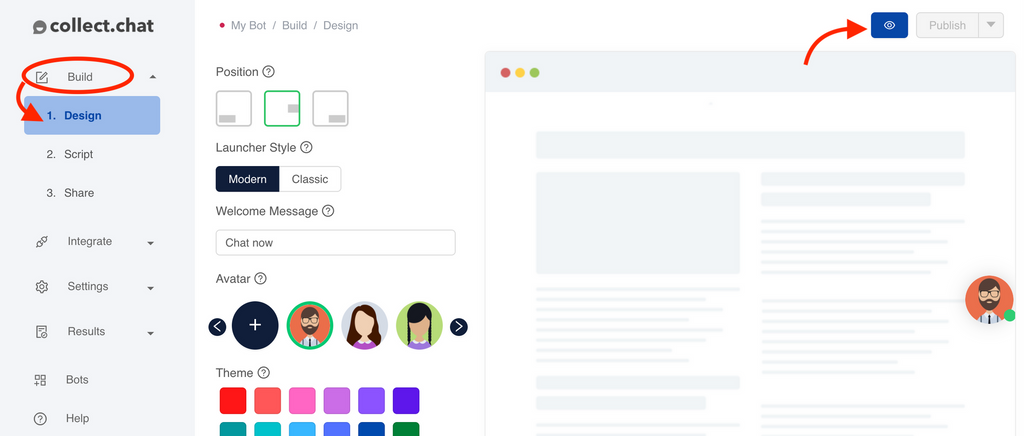
  • Go to your Collect.chat Dashboard > Build > Design.

  • Click on the Eye-shaped icon to have a test conversation with your chatbot.

  • Have a complete interaction with your chatbot.

  • Go to your HubSpot Support Pipeline and reload the page.

  • Verify that the new ticket was created

You can use the same steps to integrate Collect.chat with tools like:

Tip

You can get the timestamp information along with the webhook, by using a special variable in your Zap. Set the value of the field that has to be filled with the timestamp information to {{zap_meta_timestamp}}. More information can be found here.


Still need help?

Contact us

Was this article helpful ?

Still need help?

Contact us

General

General

How to create your first chatbot with Collect.chatGoogle Tag ManagerMailChimpShow or Hide the bot based on URLSet up custom domain for chatbot pageEmail NotificationsResponse StatusWhere can I get my Invoice?Facebook PixelSend the data to your server using webhookGoogle CalendarIs there a discount?How to add chatbot to BigCommerceTranslate your ChatbotLogical JumpGoogle SheetsSalesforceMultiple Emails and RoutingFreshdeskIntegromatMy payment has failed, what to do?What is a response?I am getting spam responsesZapierWhat happens when I upgrade or downgrade?LeadsBridgeGoogle AnalyticsWhy am I not getting email notifications?How to add billing address to my invoice?Webhook in my chatbot is not workingThe changes I made to my chatbot are not visibleWhat is your refund policy?Why is my chatbot not showing up on my website?Do you have a trial account?How to add chatbot to WordPressHow to cancel my account?How to add chatbot to Medium BlogsHow to add chatbot to ShopifyHow do you charge us?How to add chatbot to CloudflarePermanently remove my chatbotHow to make the payment?How to add chatbot to NotionCan I use Collect Chat for free?What happens when I cross the response limit?How to add chatbot to Mobile AppHow to add chatbot to WeeblyHow to add chatbot to TumblrHow to add chatbot to SquarespaceHow to add chatbot to WixShare chatbot as a Landing PageHow to add chatbot widget to WebsiteConversational Marketing Chatbots and Collect.chatHow Chatbots work inside a WebsiteHow to embed chatbot in a webpageDesign a conversational landing pageCreate a copy of the botAdd a custom avatarCan I block responses from an IP address?How to add a welcome message to chatbot widget?Add a video from LinkedIn to the chatbotStop saving data on Collect.chat's serverAdd slides from SlideShare inside the chatbotAdd a video to the chatbotCan I customize the speed of the conversation?Validate phone number inside chatbotHow to capture email addresses?Open the chatbot if user is about to leaveShow or Hide the bot based on ReferrerAddress users by name using variablesEdit the chatbot conversationShow or Hide the bot based on LanguageHow to design my chatbot?Add an image to the chatbotShow or Hide the bot based on API parametersShow or Hide the chatbot based on deviceShow or Hide the bot based on CountryShow or Hide the bot based on UTM tagsShow or Hide the bot based on Operating SystemManage the date and time of when bot has to appearHow to target my users?Show or Hide the bot based on browserOpen the chatbot as the user is scrolling downTeam CollaborationShow or Hide the bot for repeating visitorsHow to hide the chatbot for a user who has already given answersOpen the chatbot widget based on a timerRedirect to a URL based on user choiceWhat is a Script Type?Add data from URL parameters inside a conversationWhatsApp typeOpinion Scale TypeAppointment typeFile Upload TypeThank You TypeText Question TypePhone Number TypeSet up custom domain for chatbot pageRange TypeLinks TypeNumber TypeDate TypeMessage TypeRating TypeEmail TypeAdd live chat supportMulti Select TypeList TypeCapture UTM parameters from URLsSend data from chatbot to pre-fill a webpageTrigger chatbot from a Link or ButtonMulti Choice TypeHide welcome message in mobileHide welcome message for repeating visitorsHow can I analyze my data?Load a new chatbot for repeating visitorsHow to edit my personal information?Add custom messages to the conversationTrack your chatbot using custom analyticsAdd custom data in chatbot responseIdentify a user in Email or SMS campaignsDynamic web pages based on user choiceHow to enable developer options when the chatbot type is Embed?Invoke a new chatbot on the same webpageOpen the chatbot instantly on page loadDo you have an API or tools for developers?Can I export my data?Why do I see symbols in my exported CSV?Do you have support for RTL languages?How to accept only business emails?How to get IP address of chatbot userWhat does your Unlimited Plan offer?How to accept payment via the chatbot?In WordPress, how can I embed a chatbot inside a page or a post?In WordPress, how can I add a different chatbot for a different page?How to trigger a bot from a WordPress Menu?In WordPress, how can I control the behaviour of the bot?How to change my email address?Publish the chatbotHow to be an affiliate?How to change metadata for chatbot pageCan we make a messenger chatbot?Are you GDPR compliant?Can I use multiple chatbots on my websites?Where can I see my Bot ID?How to change my password?Hide welcome message everywhereSetup different chatbot on different pages of the websiteTemporarily disable my chatbotRedirect to a page when conversation endsMulti Select and Multi Choice, what's the difference?Copy a MessageHow to add chatbot to WordPressIn WordPress, how can I embed a chatbot inside a page or a post?WhatsApp typeHow to trigger a bot from a WordPress Menu?In WordPress, how can I control the behaviour of the bot?Send the data to your server using webhookIn WordPress, how can I add a different chatbot for a different page?Welcome to the AI-first Help.Center!Welcome to the AI-first Help.Center!